Each Kademi account must have at least one website to provide your content to your users. Website is a number of different parameters such as theme, applications, group access and so on. Most of them are responsible for frontend look website and it’s functionality.
So, this is one the most important thing here. When you create an account in Kademi you will be prompted to create website first for continue creating other content stuff.
First of all you need to understand versioning of the websites. You could create and edit various number of versions without interrupt production website settings and it’s content. You simply need to create your separate branch for website and choose it in the drop-down list on the right side of page. You could access “manage branches” page as well to view existing versions and do some special tasks with it.
The interface of this page is a complex and it contains next elements:
- View website button – to preview your website frontend look
- Edit pages button – link to the edit repository page where you can manage your pages and content for them
- Change website dropdown list - for selecting website for edit it
- Live button - for access manage branches page
- Editing version dropdown list - for selecting website branch to edit
It also contains six tabs for edit numerous properties.
Details
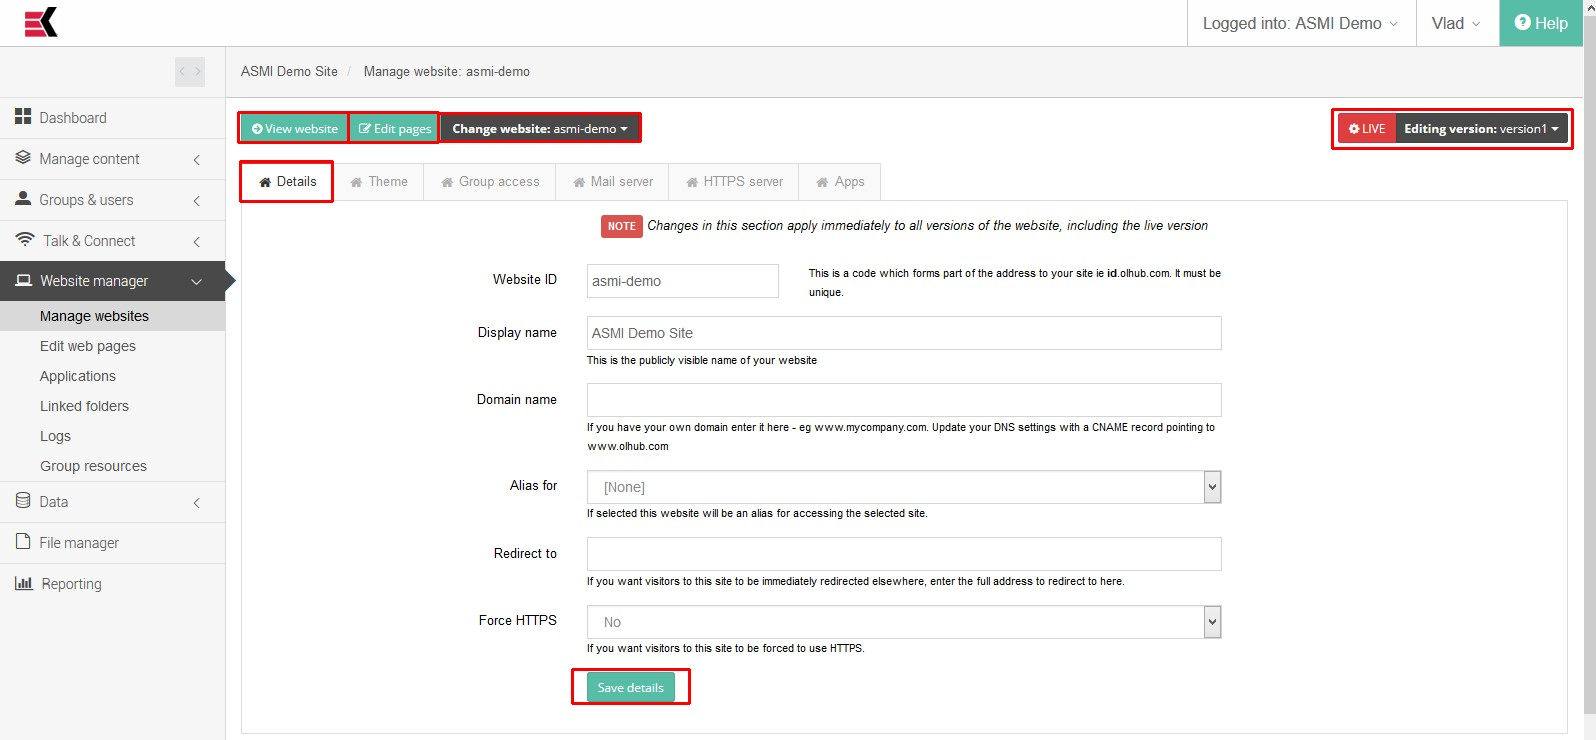
This tab provides a common information and parameters for the website. Please note, that Changes in this section apply immediately to all versions of the website, including the live version. Such properties could be changed:
| Website ID | This is a code which forms part of the address to your site ie id.olhub.com. It must be unique |
|---|---|
| Display Name | User-friendly name of the website to public visibility |
| Domain Name | Provides a domain name for your website. If you have your own domain enter it here - eg www.mycompany.com. Update your DNS settings with a CNAME record pointing to www.olhub.com |
| Alias for | Possibility to provide an alias name. if selected this website will be an alias for accessing the selected site |
| Redirect to | You could provide a full website address in case If you want visitors to this site to be immediately redirected. They will be redirected to provide address |
| Force HTTPS | Set “yes” in case you want visitors to this site to be forced to use HTTPS |
For saving your changes do not forget to push “save details” button
Theme
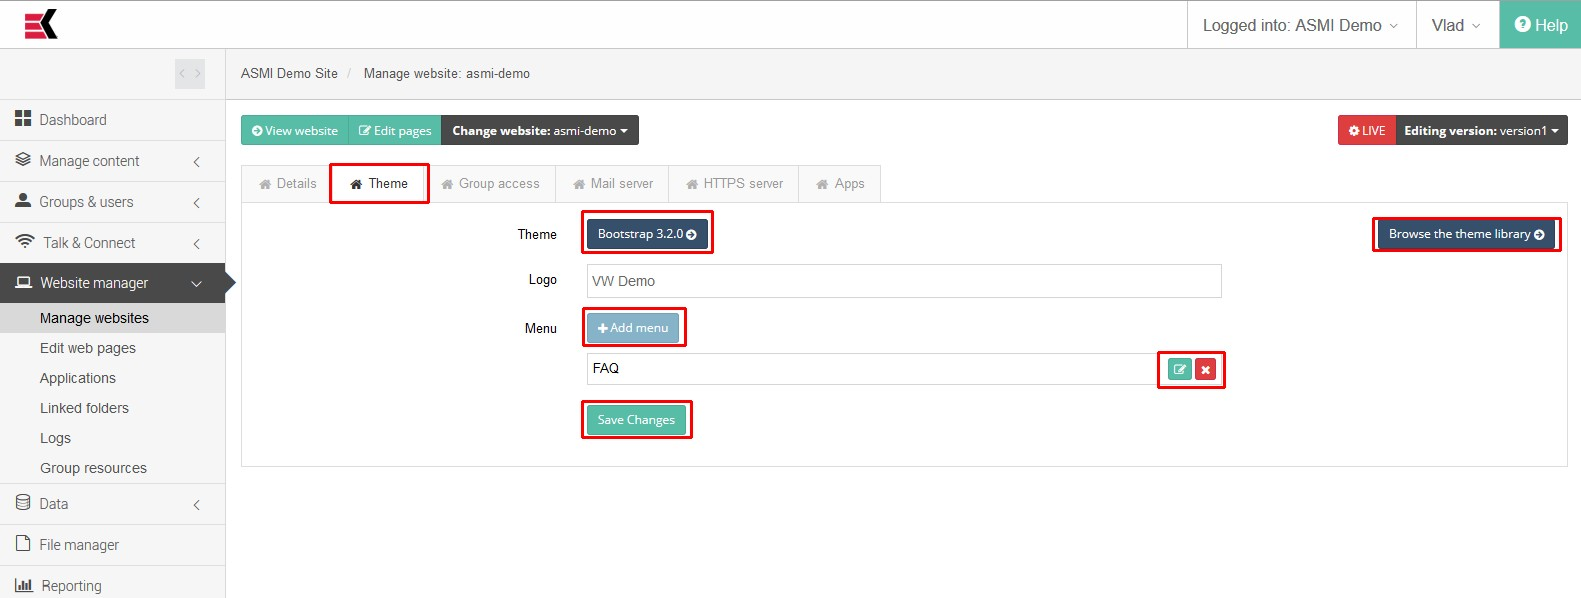
This tab provides you a possibility to choose a theme for your website. Any website should have assigned theme to become pretty and fine looks to user. It could have some different styles and functionality.
The theme which select right now is displayed near “Theme”. Clicking on it will leads you to theme select page where you will be able to select a theme for your own needs. You could access to that page via Browse theme library button as well.
Logo – This is a text which will be displayed as a logo of your website in the left upper corner on your website
You can add a numerous custom upper menu items by pressing “Add menu” button. This will allows you create a link on the upper panel of your website which may leads to your custom created page. When you adding it, you have to provide a name for this menu item and the link to it (the path where this webpage located).
For saving your changes do not forget to push “save changes” button.
Group access
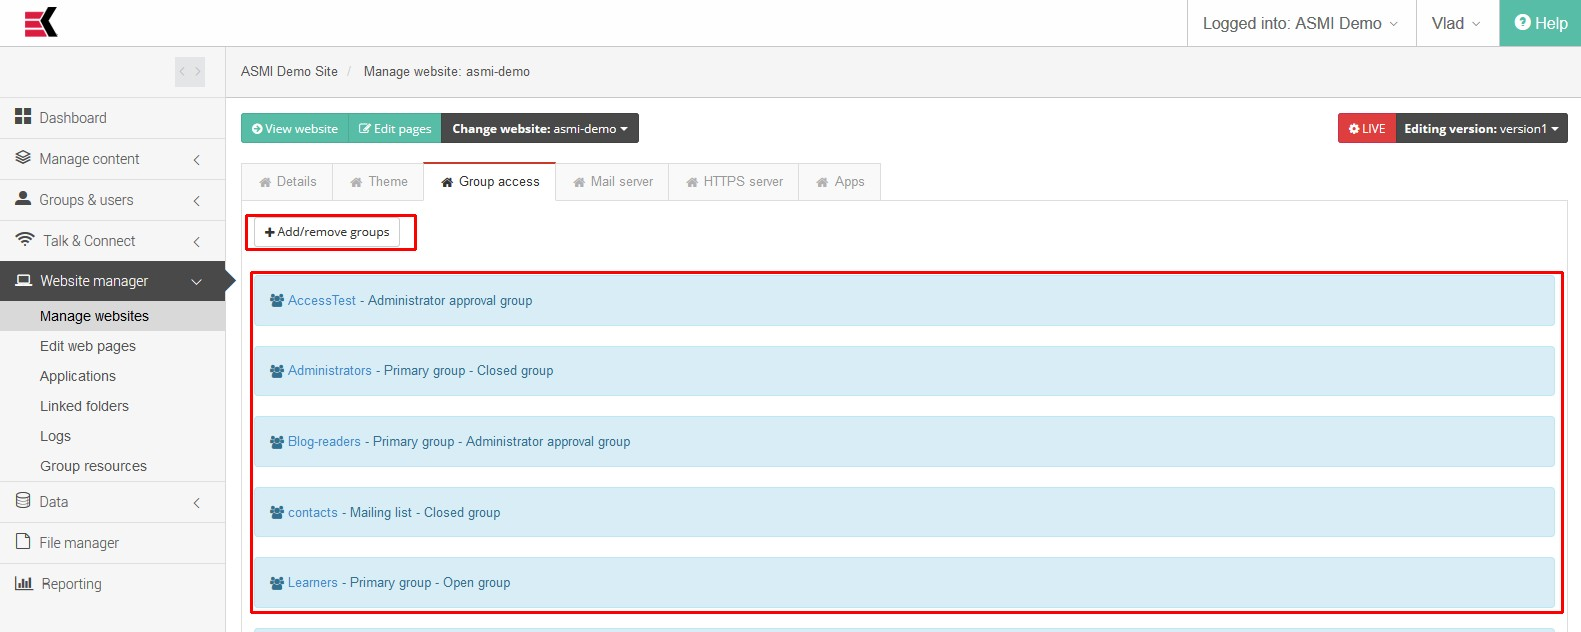
Here you can choose which groups can access your website.
Page contains Add/remove groups button where you can choose groups by selecting checkboxes which could access to this site. In addition, page contains a list of all groups which was selected.
Mail server
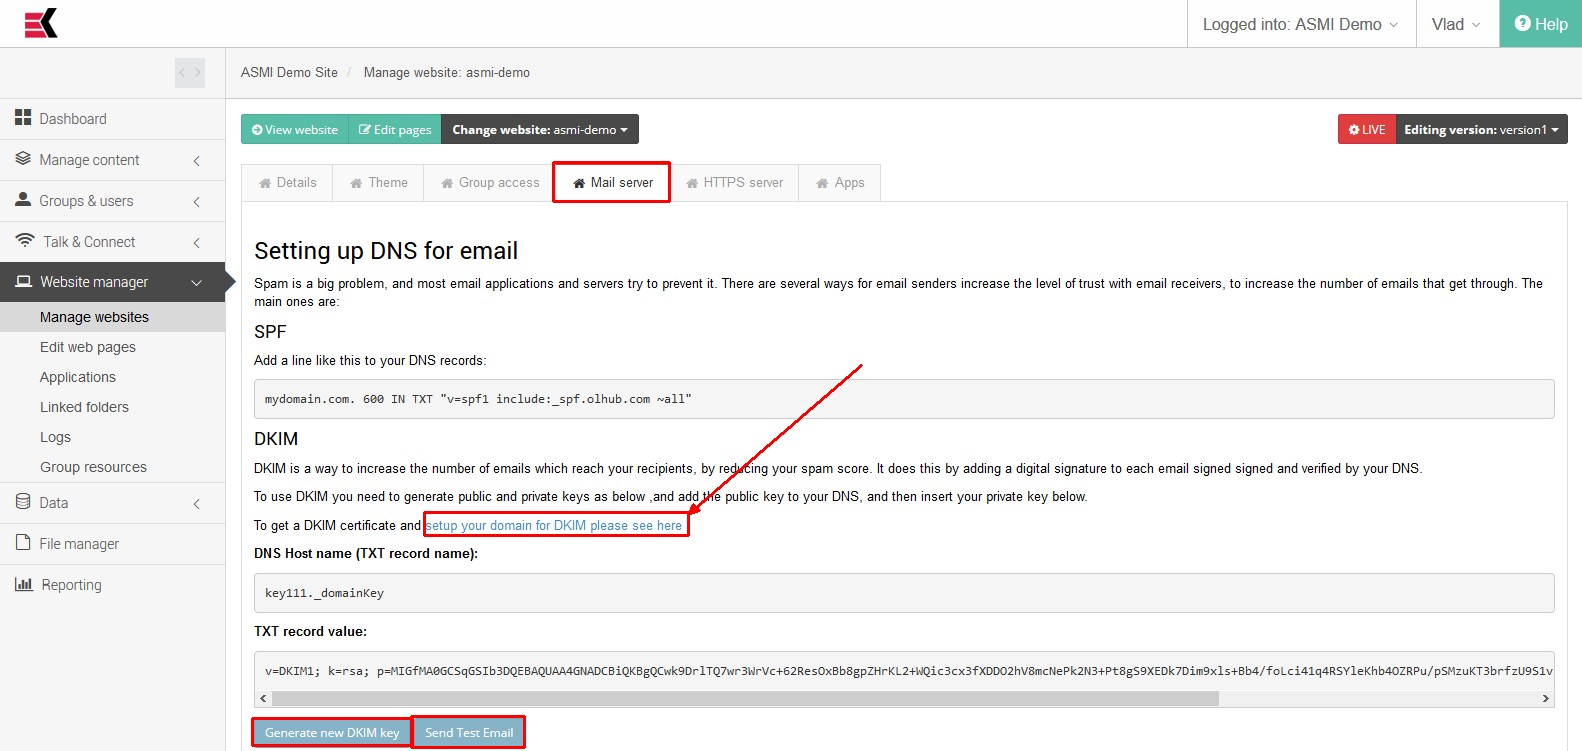
This page is dedicated to specify some email properties which may help you to avoid unwanted spam mails and to setup trust relationships with other mail servers.
There are two technologies which can be used to achieve this:
- SPF (Sender Policy Framework) - a simple email-validation system designed to detect email spoofing by providing a mechanism to allow receiving mail exchangers to check that incoming mail from a domain comes from a host authorized by that domain's administrator. Read More
- DKIM (DomainKeys Identified Mail) - is an email validation system designed to detect email spoofing by providing a mechanism to allow receiving mail exchangers to check that incoming mail from a domain is authorized by that domain's administrators and that the email (including attachments) has not been modified during transport Read More
This page provides you an instructions for either add SPF value to your DNS server configuration or generate DKIM certificate. The last thing could be done by pressing “Generate new DKIM key” button and specify key size and DKIM selector.
You could also try to send a test email message by pressing “Send test email” button where you will prompted to specify email recipient and from what address it would be send.
Https server
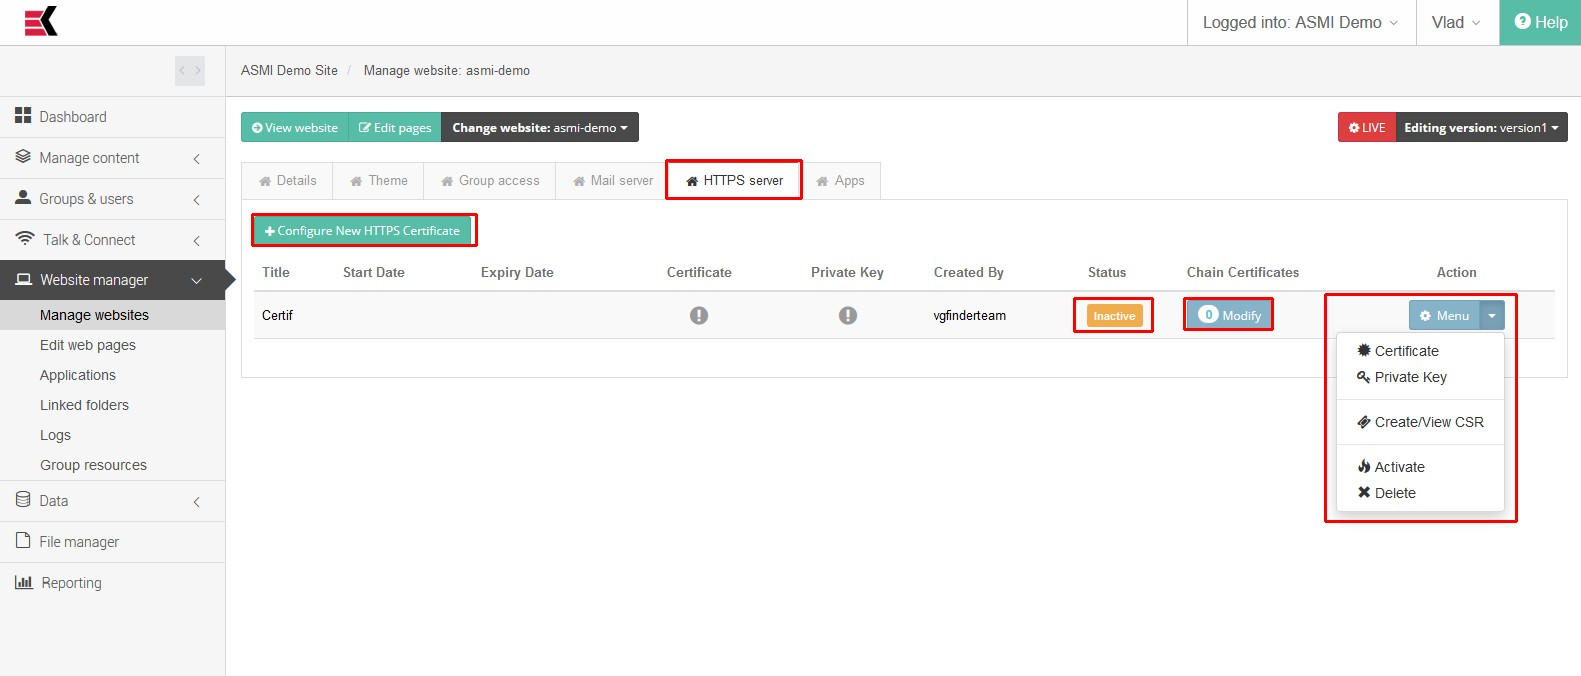
The good idea is to setup HTTPS connection for accessing your website. To do this you must to generate SSL certificate, provide it’s parameters and bring it to active state.
Page contains a button “Configure New HTTPS certificate” for creating new one. You will prompted to specify just only a name of it, all parameters should be provided further.
There is a list of already existed HTTPS certificates below and some action buttons which allows you to add and modify chain certificates and usual drop-down controls with next options:
- Certificate – for uploading certificate (x.509)
- Private key – for uploading private key (RSA/PEM)
- Create/view CSR – for edit certificate signing request
- Activate/passivate – to enable or disable certificate
- Delete – for deleting certificate
Apps
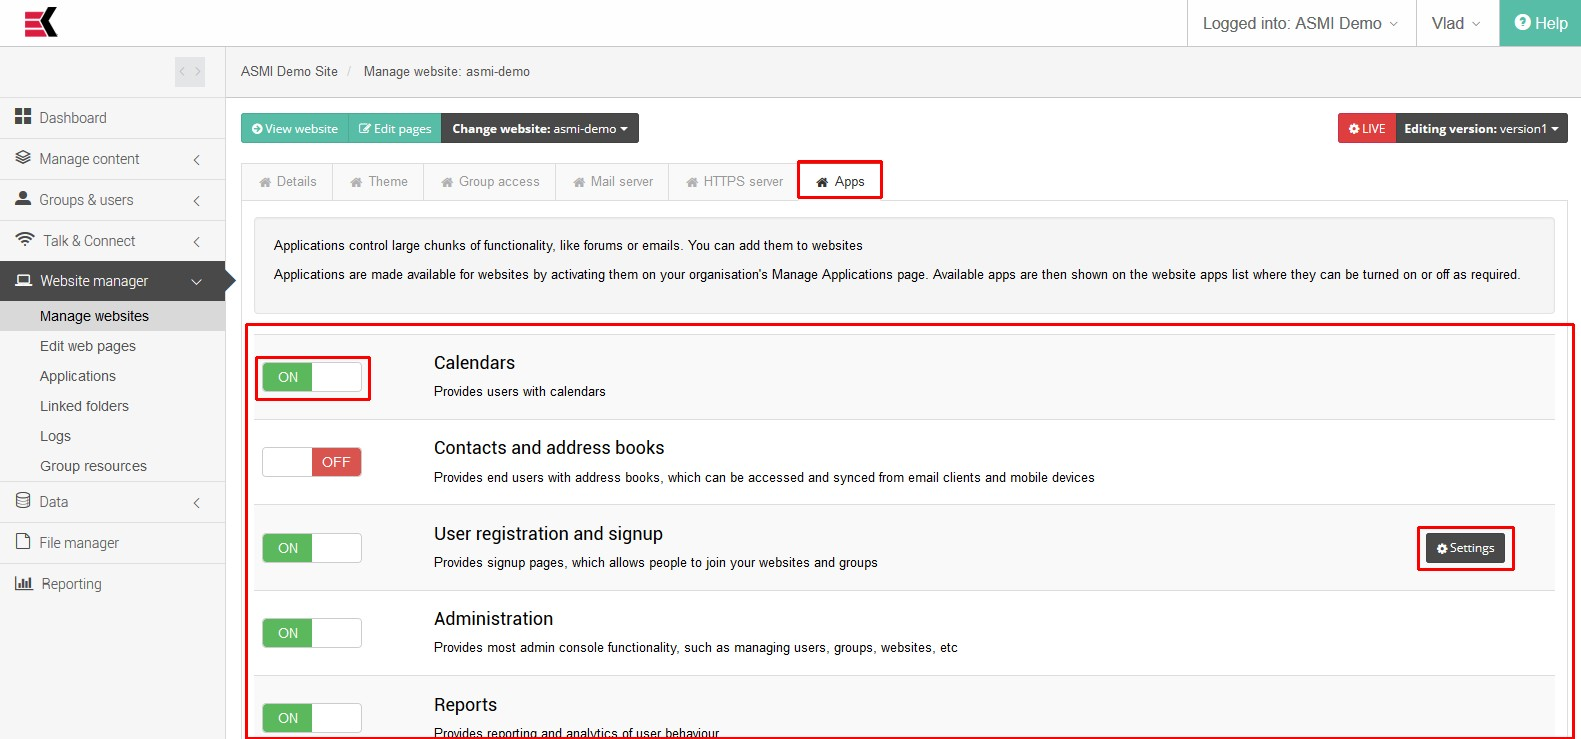
Applications provides a lot of cool stuff and things, which may increase your website informational content such as forums or auctions for example. Applications could affect to Administration console, front-end website or both.
Applications could be setup In two different places – on manage website page and on manage applications page. The first configuration will only affect current website, the second will affect whole Kademi account. When you need to enable some application you should check if it’s enabled for account and then enable it for the website. If application is disabled for the account, it will not appear in the list on the manage website page.
This page contains list of available applications with On/off switchers. To turn on or turn off you just need to click on this switcher.
Some applications could has configurable parameters. If so, there is a “Settings” button in the application row. For example, SMS application has configurable parameter to specify day limit for sending SMSs.
Ask a question, or offer an answer